
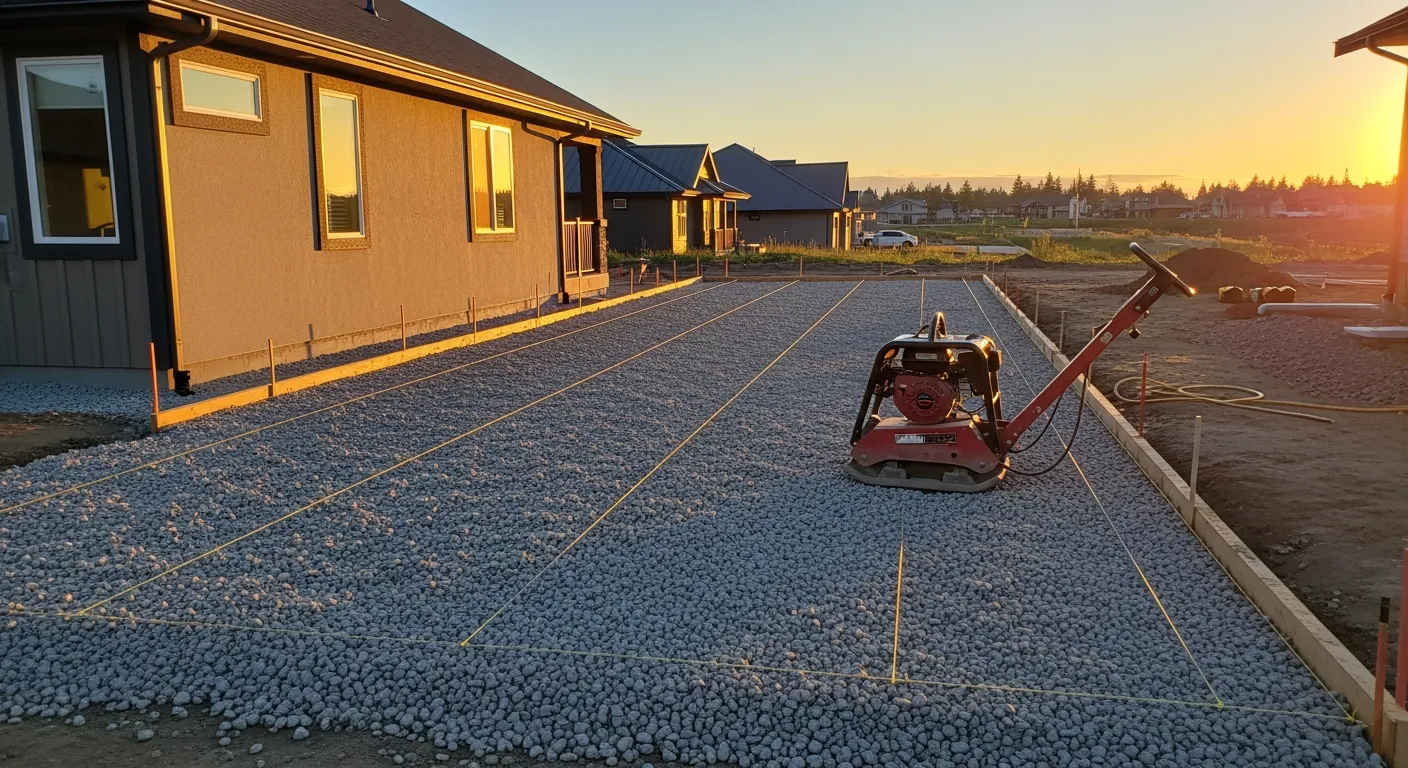
A concrete driveway looks like a concrete project. It’s really an earthwork project with concrete on top. The finish crew gets the credit, but the slab’s lifespan is decided weeks earlier — in how the ground beneath it was dug, shaped, and compacted.
Get the prep right and a driveway shrugs off Michigan winters for decades. Get it wrong and even premium concrete cracks, heaves, and settles on schedule. Here’s what proper site preparation actually involves.
Why the base matters more than the concrete
Concrete is strong in compression and weak in bending. As long as it’s evenly supported from below, it carries enormous load. The moment the support underneath gets uneven — a soft pocket here, a settled spot there — the slab has to bridge the gap, and concrete that’s forced to bend cracks.
That’s the whole game. A driveway fails not because the concrete was bad, but because the ground stopped holding it up evenly. Everything below comes down to building support that stays put.
Step 1: Strip the organics
The first thing that has to go is topsoil and anything living. Grass, roots, and organic-rich soil all decompose and compress over time, and anything that compresses under your slab becomes a void the concrete eventually drops into.
We dig down to clean, stable subgrade — free of debris and organic material — before anything else happens. This is also the stage where old driveway material gets removed and hauled out on a replacement job.
Step 2: Shape and compact the subgrade
With the organics gone, the native soil — the subgrade — gets shaped to the right contour and compacted. Both the native soil and any improved soil need to be compacted so they provide even, consistent support to everything above.
Around Kalamazoo, that subgrade is often clay. Clay holds water and swells and shrinks with moisture, so getting it to proper density and shaping it to drain matters more here than it would in sandy ground.
Step 3: Build the gravel base
On top of the compacted subgrade goes the aggregate base — crushed gravel that spreads load and gives water somewhere to go. General guidelines for residential driveways:
- A base layer of roughly four to six inches after compaction, built toward the upper end for the clay and loam soils common here.
- For weaker subgrades, a total base thickness of 10 to 12 inches is a reasonable target.
- The base gets compacted in lifts — packed in layers rather than all at once — so density is consistent top to bottom.
A quick field check pros use: on a properly compacted base you can walk across without leaving footprints deeper than about an eighth of an inch.
Step 4: Set the grade to drain
A driveway should never trap water against your house. Where the slab runs alongside or toward the home, the base is sloped away from the structure — about an eighth of an inch of fall per foot is a common target.
That slope does two jobs: it sheds surface water off the finished driveway, and it keeps water from collecting under the slab where freeze-thaw cycles can heave it. In a climate that crosses the freezing line dozens of times each winter, drainage is not optional.
Step 5: Hand off a pour-ready pad
When prep is done right, the finish crew shows up to a clean, compacted, correctly graded pad and can focus on placing and finishing good concrete. No surprises, no soft spots, no last-minute grade fixes. A smooth pour day starts with the work that happened before the trucks arrived.
The cost of skipping steps
Every shortcut in prep has a matching failure down the road:
- Skip the organic strip → the slab settles into decomposed soil and cracks.
- Skip proper compaction → uneven support and random cracking within a few seasons.
- Skip the base or build it thin → no load spreading, faster failure on heavy loads.
- Skip drainage → trapped water freezes, expands, and heaves the slab.
None of these show up on pour day. They show up a year or three later, which is exactly why prep is the easiest place to cut corners and the most expensive place to have cut them.
Frequently asked questions
Can you prep for both concrete and asphalt?
Yes. The base philosophy is similar, but the target grade and thickness get tuned to the finish material. We prep to match whatever’s going down.
Do I need to remove my old driveway first?
If you’re replacing a failed driveway, yes — and importantly, the base under it usually needs correcting too. Pouring new concrete over the same bad base just repeats the original failure.
How long does site prep take?
A typical residential driveway prep is a short job — often a day or two — depending on size, soil, and how much old material has to come out. We’ll give you a timeline with your quote.
Will proper prep really stop cracks?
Nothing makes concrete immune to every hairline crack, but the big structural cracks and the settling that ruins a driveway are overwhelmingly base failures. Good prep prevents the failures that actually matter.
Build your driveway from the ground up
If you’re planning a new driveway or replacing one that cracked too soon, the work that protects your investment happens before the concrete. Tell us about your project or call (269) 230-1777, and we’ll prep a base your driveway can stand on for the long haul.
Sources: All Brick — Subgrade Preparation for Driveways, American Concrete Pavement Association — Subgrades and Subbases.